Be sure to read the introduction and Part 1 before starting Part 2. To see bigger pictures than those below, click here.
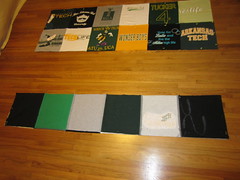
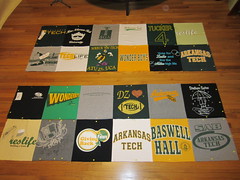
Now that you have all your pieces cut, it's time to sew!
There are several ways to do this, but I prefer cutting all my shirt squares then sewing them all. You could also cut two, sew them together, cut one, add it on, etc. If you have a helper, they could cut while you sew. Just find a method that works for you.
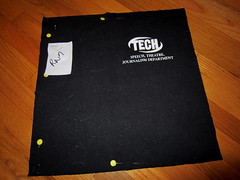
1) Take one of your squares that is an outside piece (nothing will be sewn to its left ). Put pins on its top, bottom, and left side. This helps make sure the square keeps its shape while you are sewing it. Remember that your fabric is delicate and its shape can warp easily! Handle it very gently. You'll also see that I pinned a piece of paper to this square that tells me its row number. This helps make sure you don't get your design out of order.
2) Take the square that goes to the right of the square you just pinned. Put a pins on the top and bottom of the new square.
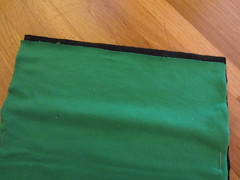
3) Place the edges that you want sewn together right sides together
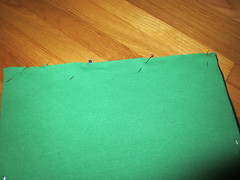
4) Line up the edges and place pins along where you want to sew.
5) Take the square that goes to the right of the last square and also place pins on its top and bottom. Then line up the edges you want sewn together right sides together, and pin. Repeat this until your entire row is pinned together. Be sure to add side pins to the square that is the last one on the right (that will not have another square added to its right).
6) Sew a .5" seam along all the edges you want sewn together, removing the pins before your sewing needle gets to them.
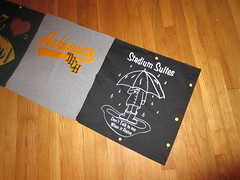
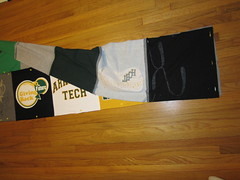
7) Now your first row is sewn! (Note that the gray square in this picture is actually a sweatshirt, so it is only one layer thick. That is why there are not top and bottom pins holding together layers of shirts--if you are using shirts, make sure your tops and bottoms are pinned!)
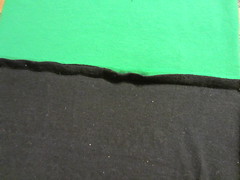
8) Place your row on an ironing board. See how your seam is sticking up? That will make your quilt top look bulky and feel funny--we don't want that.
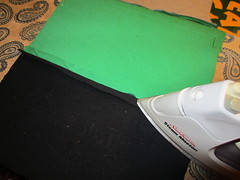
9) Separate the seam--two layers on one side, two layers on the other side. Iron it flat. TIP: Watch out for screen prints! They will melt all over your iron. If you have to iron over a screen printed graphic, place a rag or old shirt over it and iron on top of that.
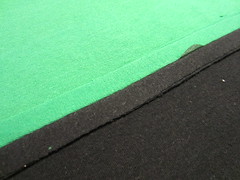
10) Now you have a beautiful flat seam. Repeat for every seam on your row.
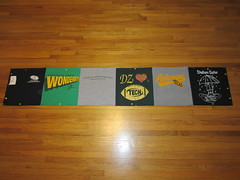
11) This is what your row will look like after its sewn and ironed. Set this aside. Repeat all the above steps for all your rows.
12) Time to sew your rows to one another!
13) To start out, figure out which row edges you want to be sewn together. Then turn one of those rows down so they are now right sides together.
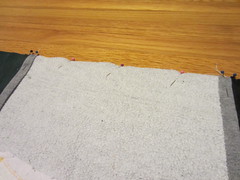
14) Line up the seams where your squares come together. It is very important to line all these up first instead of just pinning from one end to the other! Remember your fabric might have stretched or warped its shape along the way. Lining up the seams of your squares will give you the cleanest and straightest line. Also be sure that when you sew over these areas that they continue to lay in the direction shown in the picture (you want them to stay flat like you ironed them).
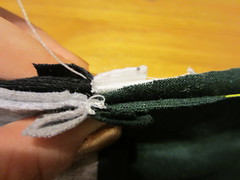
15) Put a pin on each side of the center seam to hold the seams down flat and in line with one another.
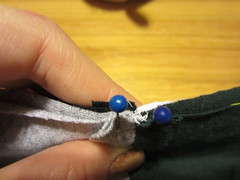
16) After you've pinned all the places where your seams join together to make a quad of four squares, pin the rest of the edges together. (You will need to take out the pins you placed there at the beginning to keep the layers together.) You might find that one shirt is a little longer than the shirt you want to pin it to. Don't worry! Play with your pin placement until the extra fabric is worked out. Use extra pins. You'll be surprised at how that extra fabric disappears.
17) Sew these two rows together then put it on an ironing board. See those bulky seams again? Can't have that.

18) Iron seam flat as you did before.
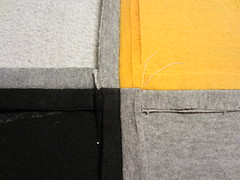
19) Repeat the above steps to sew a new set of two rows together. I recommend sewing groups of two rows together because it lessens the bulk you are dealing with at your sewing machine. Once every row is sewn
to one other row, sew them into groups of four rows. Last, sew your two
groups of four rows together. Now all eight rows are sewn together and your entire quilt top is complete! Keep the outside edge pins in place because you're about to use them.
You are now ready for Part 3, which explains making your quilt sandwich, tying your quilt, and binding it. You're almost finished!
Now that you have all your pieces cut, it's time to sew!
There are several ways to do this, but I prefer cutting all my shirt squares then sewing them all. You could also cut two, sew them together, cut one, add it on, etc. If you have a helper, they could cut while you sew. Just find a method that works for you.
1) Take one of your squares that is an outside piece (nothing will be sewn to its left ). Put pins on its top, bottom, and left side. This helps make sure the square keeps its shape while you are sewing it. Remember that your fabric is delicate and its shape can warp easily! Handle it very gently. You'll also see that I pinned a piece of paper to this square that tells me its row number. This helps make sure you don't get your design out of order.
2) Take the square that goes to the right of the square you just pinned. Put a pins on the top and bottom of the new square.
4) Line up the edges and place pins along where you want to sew.
5) Take the square that goes to the right of the last square and also place pins on its top and bottom. Then line up the edges you want sewn together right sides together, and pin. Repeat this until your entire row is pinned together. Be sure to add side pins to the square that is the last one on the right (that will not have another square added to its right).
6) Sew a .5" seam along all the edges you want sewn together, removing the pins before your sewing needle gets to them.
7) Now your first row is sewn! (Note that the gray square in this picture is actually a sweatshirt, so it is only one layer thick. That is why there are not top and bottom pins holding together layers of shirts--if you are using shirts, make sure your tops and bottoms are pinned!)
8) Place your row on an ironing board. See how your seam is sticking up? That will make your quilt top look bulky and feel funny--we don't want that.
9) Separate the seam--two layers on one side, two layers on the other side. Iron it flat. TIP: Watch out for screen prints! They will melt all over your iron. If you have to iron over a screen printed graphic, place a rag or old shirt over it and iron on top of that.
10) Now you have a beautiful flat seam. Repeat for every seam on your row.
11) This is what your row will look like after its sewn and ironed. Set this aside. Repeat all the above steps for all your rows.
12) Time to sew your rows to one another!
13) To start out, figure out which row edges you want to be sewn together. Then turn one of those rows down so they are now right sides together.

14) Line up the seams where your squares come together. It is very important to line all these up first instead of just pinning from one end to the other! Remember your fabric might have stretched or warped its shape along the way. Lining up the seams of your squares will give you the cleanest and straightest line. Also be sure that when you sew over these areas that they continue to lay in the direction shown in the picture (you want them to stay flat like you ironed them).

15) Put a pin on each side of the center seam to hold the seams down flat and in line with one another.

16) After you've pinned all the places where your seams join together to make a quad of four squares, pin the rest of the edges together. (You will need to take out the pins you placed there at the beginning to keep the layers together.) You might find that one shirt is a little longer than the shirt you want to pin it to. Don't worry! Play with your pin placement until the extra fabric is worked out. Use extra pins. You'll be surprised at how that extra fabric disappears.
17) Sew these two rows together then put it on an ironing board. See those bulky seams again? Can't have that.

18) Iron seam flat as you did before.

19) Repeat the above steps to sew a new set of two rows together. I recommend sewing groups of two rows together because it lessens the bulk you are dealing with at your sewing machine. Once every row is sewn
to one other row, sew them into groups of four rows. Last, sew your two
groups of four rows together. Now all eight rows are sewn together and your entire quilt top is complete! Keep the outside edge pins in place because you're about to use them.
You are now ready for Part 3, which explains making your quilt sandwich, tying your quilt, and binding it. You're almost finished!


No comments:
Post a Comment